Test Drive Materia on Heroku
Heroku is the fastest way to try Materia. If you don’t know what Heroku is, they provide a service for running web servers in the cloud. They manage all the hardware, allowing you to easily scale your service up and down to meet your needs.
Heroku Limitations
Heroku will spontaneously destroy and create new application servers as needed. Files stored on disk after building the initial image will be lost in this process. Currently, Heroku Materia is not able to install additional widgets unless you add them to the application config before deploying. See Installing Widgets.
Because of the disk storage hurdles, Heroku Materia installs will store uploaded media in the database. This will quickly use up the free database storage plan limit of 5mb. The database storage can be increased for a fee from the Heroku dashboard. Or, for a more scalable option, media can be stored on Amazon S3.
Heroku’s implementation of Memcached is not compatible with Materia (via the underlying FuelPHP framework). Therefore, Heroku Materia installs may be a little bit slower.
Creating a New Heroku App
Clicking the “Deploy to Heroku” button below will begin building a server. It’ll install a few widgets and give you a public web address to begin playing with Materia. The default build uses free assets, so it won’t cost a thing. To get started, just click the deploy button below.

A production ready Heroku Materia server will incur fees, but the default deploy is free.
Logging In
Heroku will create a unique and random password for each of the built in users. To login, you’ll need to access your Heroku app’s dashboard and navigate to the settings tab.
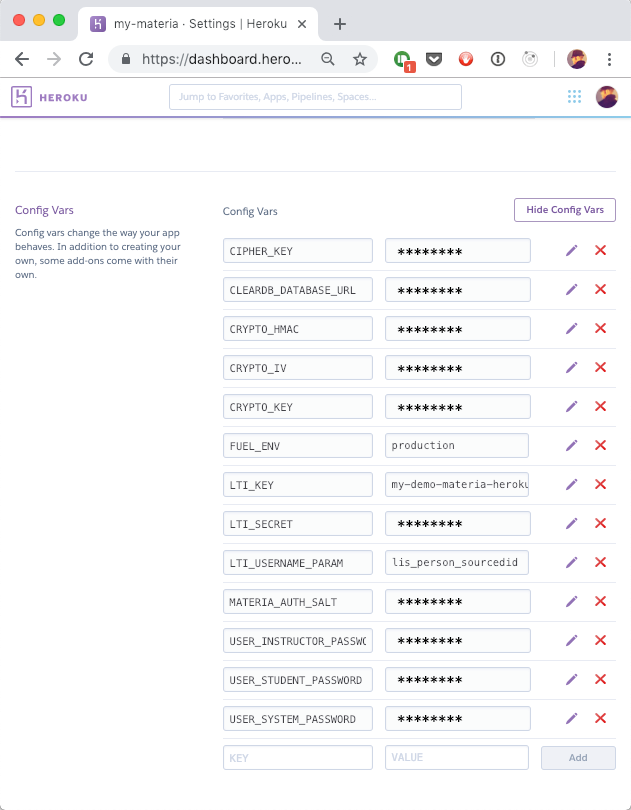
Under the section for Config Vars you’ll find the passwords for the default student, instructor, and system passwords.
Note: changing these passwords in Heroku’s Config Vars interface will not update the passwords in Materia.
Login as a Student
- Username:
~student - password:
<value of USER_STUDENT_PASSWORD>
Login as an Instructor
- Username:
~author - password:
<value of USER_INSTRUCTOR_PASSWORD>
Login as an Administrator
- Username:
~materia_system_only - password:
<value of USER_SYSTEM_PASSWORD>
Run Administration Commands
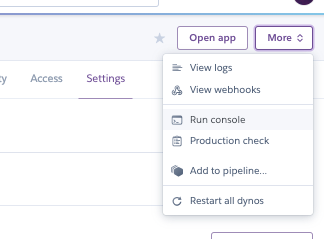
To run any of the administration commands on your Heroku server, access the Run Console menu item from your Heroku Dashboard.
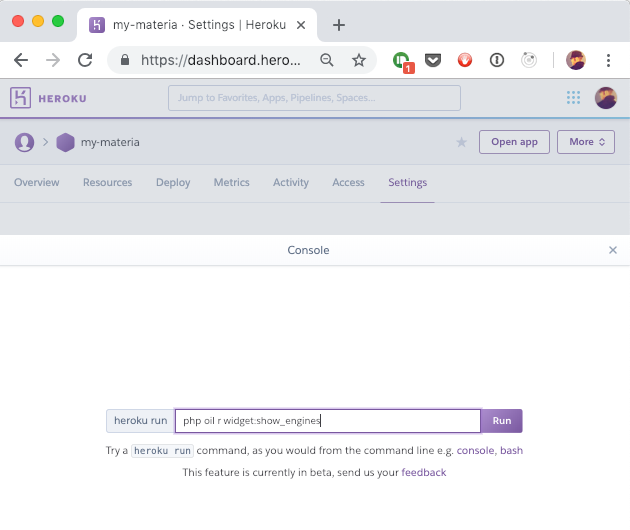
php oil r widget:show_engines on HerokuConfiguring LTI
Heroku will create a unique and random LTI key and secret for your server. To configure Materia as an LTI App in Canvas, you’ll need to access your Heroku app’s dashboard and navigate to the settings tab.
Note: changing LTI values in Heroku’s Config Vars interface will not update them in Materia.
Follow the instructions under Canvas LTI Setup using the values provided by Heroku
- LTI Consumer Key: Copy
LTI_KEY - LTI Shared Secret: Copy
LTI_SECRET - Configuration Type: Select
By URL - Configuration URL: Enter
https://<YOUR_HEROKU_APP>.herokuapp.com/lti
Installing Widgets
Due to limitations on Heroku, widgets must be installed in the Heroku app build process.
To add or change which widgets are installed, you can make changes to the Materia Heroku config file in your own fork of Materia.
The widget files need to be accessible from the web, and need to be accompanied by a yaml file containing build and checksum information.